banana bread with toasted millet

banana bread with toasted millet

My freezer needs some serious organizational help. It's full of half bags of frozen fruit, chocolate disks for melting or chopping and peas and corn for my little weirdo who likes to eat them frozen. I've got about 20 pounds of alternative whole grain flours to aid in my obsession for all things Kim Boyce and add to that mix ins and toppings like toasted millet, flax seeds and cocoa nibs and that equals one packed freezer. There's a lot of great stuff in there, but it's all such a mess, I can hardly tell what's in there at all. 

A few weeks ago, with the help of my much more fashionable friends, I created a capsule wardrobe (find out more here). The basic explanation is you whittle down your wardrobe to only 37 pieces for a particular season (just 3 months), including pants, tops, outerwear and shoes and you don't buy anything in that time. It sounds really restrictive, which is why I waited so long to do one, but as it turns out, it's incredibly freeing. Admittedly, fashion is something I'm interested in, but it's not the highest priority in my life. My closet is full of basics, most of which can be worn while chasing a toddler or cooking up a big batch of bolognese. It did get me thinking though about what I really need and how much of my house is full of just space fillers, particularly my kitchen (ahem... my freezer). I think the concept of the capsule wardrobe could apply to many parts of our lives. The bulk of the hoarding in my life is centered in the kitchen. Fancy vinegar, five different types of lentils, a spice cabinet that now has to be double stacked. I like the idea of having a few quality ingredients that I use often, with the infrequent exception of something fancy and less utilitarian. 

banana bread with toasted millet
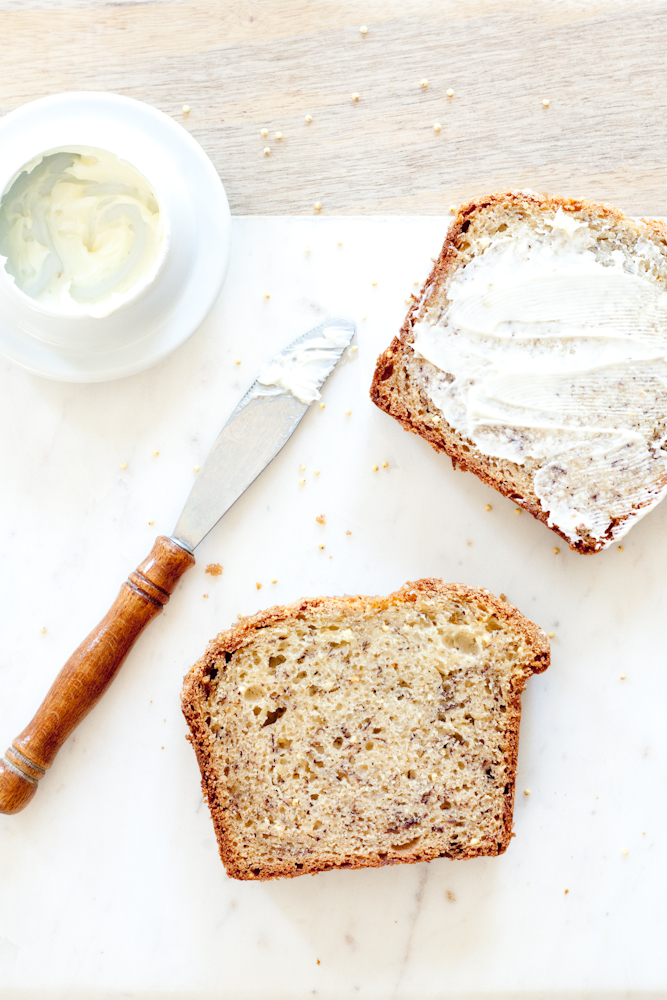
banana bread with toasted millet and butter or nutella

So, in an effort to start the process of narrowing down what I actually need, I decided I needed to start using what was actually in there. I had three ziplock bags full of perfectly black bananas, so I figured I'd just bake a whole bunch of stuff. I made a batch of banana cereal muffins (from Kim Boyce's book of course) and then a pair of banana breads with the addition of toasted millet, which I absolutely loved. It was nice to have a little more room in the freezer, although, the next day I made peach + yogurt popsicles which pretty much filled the vacant space. 

banana bread with toasted millet

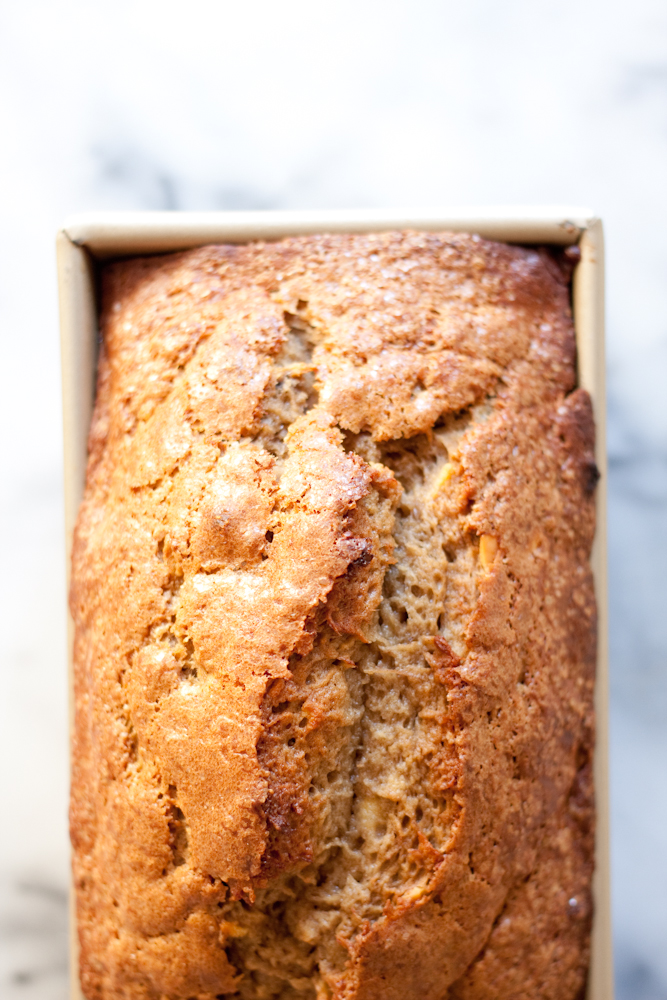
This recipe is from The Grand Central Baking Book. I can't say enough good things about this book. It's great for someone who is a proficient baker and it's great for someone just starting out. This recipe for banana bread is pretty straight forward and it produces exactly what you want in a banana bread. It's moist, tastes like banana and it has some crunch to it with the addition of the millet and course sugar. I do realize this is the second banana bread recipe I've shared with you, but I feel like I'm always looking for the best one. I'm pretty sure this one is it. 

banana bread with toasted millet // makes 2 loaves // adapted from this book

Ingredients: 

  • 4 cups all purpose flour
  • 1 1/2 teaspoons baking soda
  • 1 teaspoon baking powder
  • 1 teaspoon salt
  • 2 cups (14 ounces) granulated sugar
  • 2/3 cup (5 fluid ounces) canola oil
  • 2 1/2 cups (1 pound 4 ounces) banana puree (about 4 small bananas)
  • 4 eggs
  • 2 teaspoons vanilla extract
  • 1 cup (8 fluid ounces) buttermilk
  • 2 heaping tablespoons toasted millet
  • course sugar

Preparation: 

  1. Preheat the oven to 350 degrees. Lightly grease and flour two 9x5 inch loaf pans. 
  2. Whisk together the flour, baking soda, baking powder and salt in a medium bowl. 
  3. Using a stand mixer with a paddle attachment, beat the sugar, oil and banana puree on medium-high speed until the mixture is lighter in color, about 3 minutes. 
  4. Crack the eggs into a liquid measuring cup, add the vanilla and whisk together. With the mixer on low speed, slowly pour in the eggs. Continue to mix until the eggs are fully incorporated. 
  5. Add one-third of the dry ingredients and mix briefly on low speed, then add half of the buttermilk. Mix well and repeat, using half of the remaining dry ingredients and the rest of the buttermilk. Add the remaining dry ingredients and mix just until combined. 
  6. Using a rubber spatula, scrape down the sides and bottom of the bowl and fold in the toasted millet, then divide the batter between the two pans. Top with a sprinkle of coarse sugar. 
  7. Bake for 30 minutes, then rotate the pans and bake for 30 minutes more. Lower the temperature to 325, rotate again and bake for 30 minutes more. The loaves should be golden brown with cracked tops, and a skewer inserted in the center should come out clean. 
whole wheat chocolate chip cookies

whole wheat chocolate chip cookies

I own a ridiculous amount of cookbooks. If somehow the internet ceased to exist, I would have enough recipes on hand to cook three meals a day for the rest of my life. Many of these cookbooks are used for reading and inspiration rather than recipe following. There are a lot of people out there who know a lot about this cooking stuff, and I want to know what they know. 

There are books that I do use for their recipes and these are mostly baking books. Cooking can be a bit fluid. A little of this, a little of that and it's more than likely going to turn out just fine, but baking is a little more finicky. You've got to pay attention to the way the ingredients work together, making sure they interact properly, giving you the desired result. I have three or four books that I turn to often, with one in particular that has kind of grabbed a hold of me. Because of this book, 75% of my freezer is packed with alternative flours like amaranth and dark rye. I have corn flour and barley flour and two bags of oat flour. While it may sound like I'm stocking up for a gluten-free baking extravaganza, I'm actually just really into Kim Boyce's book, Good to the Grain. I had made the oatmeal sandwich bread from her book many times, and I absolutely love it (that reminds me, I need to start a batch this afternoon), though I never really made anything else out of the book, mostly because I didn't have the alternative flours she uses on hand. It wasn't until I visited her bakery, Bakeshop in Portland, that I started to hoard whole grain flours and couldn't wait to bake every single thing in that book. 

whole wheat chocolate chip cookies

These whole wheat chocolate chip cookies are actually made with 100% whole wheat flour, not for the health benefits, but because the whole wheat flour adds a nuttiness and a chew that you don't get from all purpose flour. They're also huge, which I kind of like. When you want a cookie, eat a cookie. Because they're hefty, I think they would hold up pretty well with other mix-ins like walnuts (if you're that type of person). 


whole wheat chocolate chip cookies // makes 20 cookies

(very slightly) adapted from Good to the Grain 

Ingredients: 

Dry mix

  • 3 cups whole wheat flour
  • 1 1/2 teaspoons baking powder
  • 1 teaspoon baking soda
  • 1 1/2 teaspoons kosher salt

Wet mix

  • 8 ounces (2 sticks) cold unsalted butter, cut into 1/2 inch pieces
  • 1 cup dark brown sugar
  • 1 cup sugar
  • 2 eggs
  • 2 teaspoons pure vanilla extract
  • 8 ounces bittersweet chocolate, roughly chopped (I used bittersweet chocolate chips with excellent results)

Preparation: 

  1. Place two racks in the upper and lower thirds of the oven and pre-heat to 350 F. Line two baking sheets with parchment paper or a silicone baking mat. 
  2. Mix the dry ingredients in a large bowl. Set aside. 
  3. Add the butter and sugars to the bowl of a standing mixer fitted with a paddle attachment. With the mixer on low speed, mix just until the butter and sugars are blended, about 2 minutes. Use a spatula to scrape down the sides of the bowl. Add the eggs one at a time, mixing until each is combined. Mix in the vanilla. Add the flour mixture to the bowl and blend on low speed until the flour is barely combined, about 30 seconds. Scrape down the sides and bottom of the bowl. 
  4. Add the chocolate all at once to the batter. Mix on low speed until the chocolate is evenly combined. Use a spatula to scrape down the sides and bottom of the bowl. 
  5. Scoop mounds of dough, about 3 tablespoons in size onto the baking sheet, leaving 3 inches between them, or about 6 to a sheet. 
  6. Bake the cookies for 16-20 minutes, rotating the pans halfway through, until the cookies are evenly dark brown. Transfer the cookies, still on the parchment, to the counter to cool, and repeat with the remaining dough. These cookies are best warm, but will keep in an airtight container for up to 3 days. You can also wrap the cookies in plastic wrap and then place in a zip top bag for up to 2 weeks. 

banana almond bread

banana almond bread

I'm on vacation from work this week. The freedom feels so familiar and comforting. I've been a full time working mom for a little over two months now and it seems to be getting harder rather than easier. I anticipated this phenomenon, knowing that there would be a recognizable honeymoon phase. The first couple of months happened to be our busy season so there was little time to think, which was a huge blessing. I spent a lot of time catching up with all the co-workers I had missed so much and the rest of the time getting re-acclimated to the working world. My son was sick for the first three weeks I was back thanks to all of those super fun kid germs at daycare. He had the flu first, which both Jon and I caught and then he suffered from a cold for a couple of weeks which he passed along to me, but spared Jon the excitement. They say that sharing is caring. It was a rough first month. 

banana almond bread

I love my job. Taking care of people is something that is woven into the fabric of my being. This is probably why I love to feed people so much. Giving keeps me going and makes me feel like myself.

Working outside of the house has some distinct advantages. No one follows me to the bathroom when I have to go. I can get through an entire conversation with another adult without a toddler trying to pull my pants down or yelling for me to push him around in a tiny wooden tray. My lunch hour has an incredible amount of possibilities and I can come and go as I please within that hour. Money is nice. Not depleting our savings is pretty great as is the ability to buy things we want, but in this moment, those all feel a little dim in the light of that almost two year old with whom I'm so smitten. 

banana almond bread

We went to the zoo yesterday and shared a blueberry muffin and a croissant at a favorite cafe in San Francisco. When we had our fill of giraffes and gorillas, we went to visit a friend in our old neighborhood. Oliver played with toys and balloons and I caught up with a dear friend. It was a perfect day. I cried at the end of it when I hugged him in the kitchen as he laughed hysterically at my fake sneezes. I miss him. There's no way around it. I know a lot of women do this and they get through it, even enjoy it. I'm hoping that I'll get there soon. 

banana almond bread

Everyone needs a great banana bread recipe in their repertoire. This one is a little unconventional but pays off in the end. You can store the loaf in an airtight container at room temperature for a couple days but I like to put mine in the fridge because I'm a weirdo and I like cold cake. You'll lose the crispy crunch on top of the cake when you store it, so try to eat as much as you can on the day it's baked. 

banana almond bread

makes one loaf

adapted from this recipe

Ingredients: 

  • 1 3/4 cups flour
  • 1 teaspoon baking soda
  • 1/2 teaspoon sea salt
  • 1/2 teaspoon ground cinnamon
  • 1/8 teaspoon ground ginger
  • 1/8 teaspoon ground cloves
  • 1/8 teaspoon freshly ground nutmeg
  • 1 cup packed brown sugar, divided
  • 2 eggs
  • 1/2 cup greek yogurt
  • 3 ripe bananas, divided
  • 1/2 cup vegetable oil
  • 1/3 cup sliced almonds
  • turbinado sugar (also known as raw or coarse sugar)

Preparation: 

  1. Grease a 9x5x4 loaf pan with butter or non-stick spray and pre-heat the oven to 350 degrees with a rack in the middle. 
  2. Combine the flour, baking soda, salt and spices in a large bowl. 
  3. In a medium bowl, using a hand held mixer, beat the eggs and 3/4 cup of the brown sugar until light and fluffy, about 2 minutes. Add 1 banana, the yogurt and a 1/4 cup of brown sugar and beat until well combined, with just a few lumps remaining. Add the oil and blend to combine. 
  4. Coarsely mash the remaining two bananas with a fork and fold into the wet ingredients. 
  5. Dump the wet ingredients into the dry ones and toss in the almonds. Mix with a wooden spoon until just combined, being careful not to over mix the batter. 
  6. Pour the batter into the prepared loaf pan and sprinkle the top with sugar. Bake in the center of the oven until a toothpick stuck in the center comes out with just a few moist crumbs, about 45 minutes to 1 hour. 

eat your feelings (wrapped in pastry)

beef hand pies

This morning was our sons first day of daycare. I have prepared for this moment for weeks, running it over and over again in my head. I have made lists and plans and will have more things to do in the next two weeks before starting work than I can realistically accomplish. As an extra precaution, I asked my husband to go to breakfast with me after the drop off this morning so that I'd have something to look forward to while I did my best not to sob uncontrollably. We went to a new bagel shop and talked about how the morning went and if we should just bite the bullet and let him go full time this week instead of doing half days like we had planned. After the bagels, we popped next door to our favorite donut shop to share a donut, just because we could (and because I was eating my feelings). 

beef hand pies

Transitions can be rough for me. I love to think about change and dream about what could be, but often when we get right down to it, I usually wish things could stay the same forever because I'm never really sure. This morning I certainly felt that. I was ready to throw in the towel on all of this change and call it a day. Thankfully, my husband is rock solid. He makes decisions based on logic (what is that?!) and therefore rarely regrets a decision. He also realizes that right now I'm going through all of the emotions of a major life change and eventually I'll get through it and join him on solid ground. Like the fact that I thought I was going to paint the entire kitchen, including the walls and cabinets, all by myself in the next two weeks. Oh, and go on vacation in the middle of it, too. Haha! I'm really trying to put a band aid on how I feel right now. (Does anyone have a donut?!)

At the end of the day, I showed up to get Oliver from daycare and I stood there for 15 minutes while he played, not even aware of the fact that I had arrived to get him. When he finally did notice me, he gave me a little nod and kept right on playing. Of course, I expected him to come running to me with tears in his eyes, wanting to cling to his mama, but I'm so grateful that he didn't, showing me that he was perfectly happy where we have placed him. That is the best scenario I could have hoped for. Tomorrow, we are going to pull off the band aid and let him stay all day. I'm planning on dropping him off and heading to San Francisco instead of painting the kitchen. I'll sit in my favorite cafe and enjoy a cup of coffee without disruption and I'll be so thankful to know that he's not missing me. 

beef hand pies
beef pies
beef hand pies

With the combination all of these life changes and the cooler weather, I've been in a comfort food routine for a few weeks. Last Sunday, I was a good wife and made pot roast. I took my mothers advice and doubled the recipe so I was left with a whole lot of roast and no plan. Well, where there is no plan, there is a buttery pastry waiting to be filled. I roasted some potatoes and squash with some cozy herbs and wrapped it up in a wheat pastry. This might be the best way to eat leftovers. I now want to put everything in pie dough. 

beef hand pies
beef hand pies
beef hand pies
beef hand pies
beef hand pies
beef hand pies

When you find yourself with some leftovers, you've got to give this a try. If you don't have leftover meat, or you're a vegetarian, sautéed mushrooms would make an excellent stand in, but use 5 cups of sliced mushrooms and then sauté. You'll lose a lot of volume by cooking them. If you don't want to make the pastry, a store bought one would certainly make this a quick meal, and don't we all need extra time in the day. 


beef hand pies (or the best way to eat leftovers)

makes 8 hand held pies

Ingredients: 

For the pastry dough

  • 1 teaspoon salt
  • 2/3 cup very cold water
  • 2 cups, plus 2 tablespoons all purpose flour
  • 1 cup whole wheat flour
  • 1 cup, plus 5 tablespoons unsalted butter, very cold, cut into 1 inch cubes (keep cold until needed)

For the filling

  • 3 cups left over cooked meat (like pot roast or roasted chicken), cut into 1 inch pieces
  • 1 small butternut squash, peeled, seeded and cut into 1/2" cubes
  • 5 small red potatoes, cut into 1/2" cubes
  • 1/2 large yellow onion, diced small
  • 1 tablespoon fresh thyme leaves (from about 12 stems)
  • 1 tablespoon fresh sage, minced (about 8 small leaves)
  • 1/2 tablespoon kosher salt
  • freshly ground pepper
  • 1 tablespoon olive oil
  • 1 cup finely shredded parmesan

Egg wash

  • 1 egg, lightly beaten
  • 1 tablespoon water

Preparation: 

  1. Mix the salt into the water until dissolved and keep cold until needed. 
  2. Add both flours to the bowl of a food processor and add butter. Pulse until the butter is the size of peas. Add the water and pulse until the dough is just starting to hold together and is starting to look a little damp. Pour the contents out of the bowl onto a lightly floured surface. Divide the dough in half and gently bring one half together into a 5" disk. Repeat with remaining half. Cover with plastic wrap, add to a ziplock bag and refrigerate for at least two hours or overnight. 
  3. When the dough is chilling, pre-heat the oven to 400 degrees. Toss the potatoes, butternut squash, onion, thyme and sage in olive oil. Arrange the vegetables in a single layer on a rimmed baking sheet and sprinkle with salt and freshly ground pepper. Roast until very tender and starting to brown, about 45 minutes. Set aside to cool. 
  4. Line two rimmed baking sheets with a silicone mat or parchment paper.
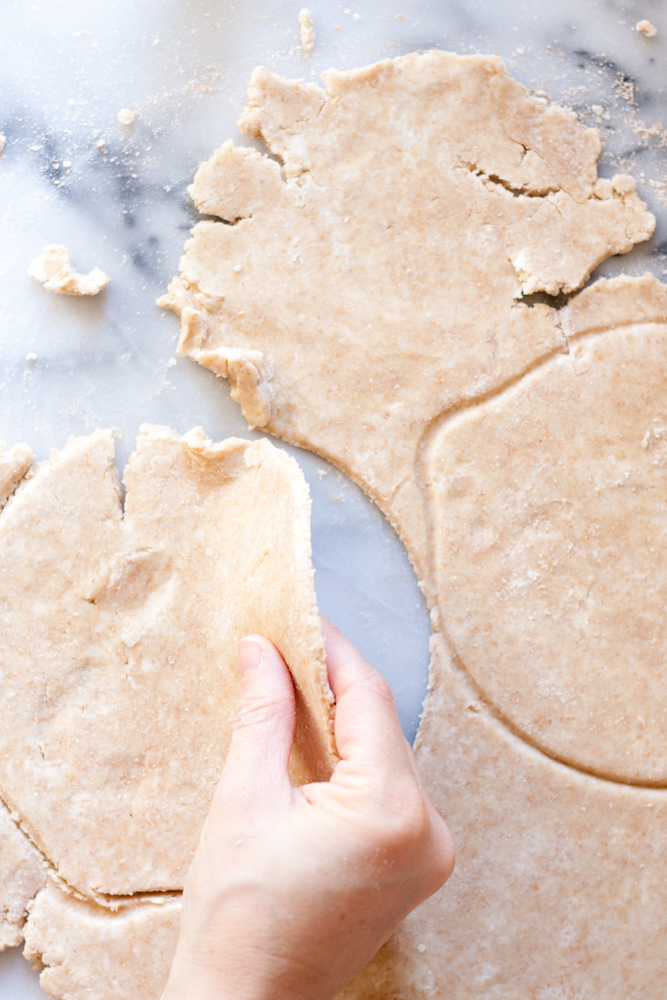
  5. On a lightly floured surface, roll out one of the disks to about a 1/4" thick. Keep the other disk in the fridge to keep cold. Cut out 6" (or close to it) diameter circles using a bowl or cake pan, or free hand it! You can see above that my circles were pretty wonky, so don't be too worried about how perfect they are. You should get about four per pastry disk. Re-roll the pie dough only once to use up the scraps. 
  6. On one half of each piece of dough, add a scant 1/4 cup vegetables and 4-6 pieces of meat. Add a decent sprinkle of parmesan cheese and fold the top half over. Crimp the edges with a fork to seal and transfer to the baking sheet. Place the sheet into the freezer while you make the other pies, adding each one to the freezer as you finish them. 
  7. Brush the tops of the pies with egg wash and cut 1/2" slits into the top of the pies to vent.
  8. Bake on the top third and lower third rack of the oven at 400 degrees until golden and cooked through, about 22 minutes. Rotate pans halfway through to ensure even cooking.