roasted tomato puttanesca

roasted tomato puttanesca

This first week of fall has been gloriously fall like. The mornings are cool, warranting a sweatshirt and slippers and the days have been a bit gloomy, even giving way to some refreshing rain. The mantle has been aglow with candles and the slow cooker has endured a few good workouts, turning out some of the most comfy food I can think of. It was just what the doctor ordered for this slightly stressed mama. Nothing beats sweats and comfort food when you're not at your best, amiright? 

As I believe I've mentioned, we are wading through some heavy decisions in our house. Dinner time has been such a haven for us as we take the time to sit down together, eat something good and talk it all out. Tonight, our conversation was particularly heavy and as my husband and I were going back and forth, Oliver, covered from head to toe in tomato sauce, was making sure we clapped every time he used his fork to spear his pasta and successfully made it into his mouth. He is such a reminder to me that while this time made be difficult, there is so much joy in it. The hard times can sometimes feel so hard and I often feel like I can be so short sighted without the ability to see the big picture. This little boy is so helpful for putting things into perspective. 

roasted tomato puttanesca

Early in the week I found myself up to my ears in cherry tomatoes and since I was already on a comfort food kick, I decided that roasting them is the coziest way I know to treat a tomato. I used a few in a warm lentil salad I made from Yotam Ottolenghi's Plenty and the rest were packed away in the fridge awaiting inspiration. This afternoon, once the babe was sound asleep, I spent some time cooking up a deeply rich puttanesca that ended up being an incredibly satisfying way to end the week. The sauce is quite thick and coats the pasta perfectly, hanging on tightly even when a toddler is attempting to shovel it in his mouth. 


roasted tomato puttanesca 

makes 6 cups, enough for 2 pounds of pasta

Ingredients: 

  • 4 pounds cherry tomatoes, halved
  • 2 tablespoons fresh thyme leaves
  • 4 tablespoons olive oil, divided
  • 1 tablespoon kosher salt, divided
  • 4 large cloves garlic, sliced
  • 1/2 large yellow onion, diced
  • 1/2 tablespoon dried oregano
  • 2 tablespoons capers
  • 1/2 cup water
  • 1 tablespoon dill, chopped 

Preparation: 

  1. Heat the oven to 265 degrees. Cover two sheet pans in foil, set aside. 
  2. Toss cut tomatoes in 2 tablespoons olive oil, fresh thyme and 1/2 tablespoon kosher salt. Roast in the oven until starting to dry out, about an hour and a half. Transfer to a bowl. 
  3. Heat remaining 2 tablespoons olive oil in a medium sauce pan over medium-high heat until glistening. Add garlic, onion, oregano and capers and cook until lightly browned, about 5-6 minutes. Add roasted tomatoes and water and bring to a simmer. Cook, uncovered for 30 minutes until reduced and thickened slightly. Puree the tomato sauce with a stick blender or in a counter top blender until smooth. Stir in the dill. 

one pan chicken with crispy potatoes

one pan chicken + potatoes

Before I had a child, I thought staying at home with a kid would mean I would have a ton of time to do all the things I never had time for when I worked full time. I figured my husband would always come home to a clean house that smelled of roasting meat with me in my apron and Ollie in clean clothes. At the very least, dinner would be ready at a reasonable hour, so that we would have some solid time together before the baby had to go to bed. Fast forward a year and a half and the scene is a lot less Pleasantville and a lot more Roseanne. Ah, naivety.

Today I didn't get to shower. We spent the morning at Costco crying over blueberries we couldn't eat at that very second. The new chicken costume helped with that disappointment, thankfully. Nap time was a rush to take a few pictures and then finish my resume so I could get it into the hands of the right people. By the time that was finished and edited, the babe was awake. The kitchen was a mess and dispersed from my makeshift photo studio and both sides of the sink were spilling over with dishes, but we left all of the mess at home and walked to the park anyway. Ollie went down the slide for the first time all by himself, never put sand in his mouth and I didn't even think about dishes one time. It was pretty great. At 4:45 we walked in the door, Ollie got a late afternoon snack and watched an episode of Bubble Guppies (I remember when I said my kid would never watch tv) while I tried to get a start on some of the dishes and a jump on dinner. Jon came home early to dirty dishes, onions and garlic on the stove, laundry that hadn't been folded and he kissed a wife who probably should have put on another layer of deodorant at some point during the day. We ate simple beef tacos with plenty of hot sauce and laughed a lot. There were no phones around and no to-do lists. Just us, around the table and now that I really think about it, that version of parenthood is actually pretty great. 

thyme for potatoes
potatotes
bi rite

Since I don't need any help in the 'generating dishes' category, one pan recipes are highly sought after in our house (especially by Jon who frequently takes the dish washer job after dinner). We roast a chicken at least once a week, using just one pan which usually takes an hour, but lately I've started removing the backbone to speed up the cooking. Because all of the flesh is in contact with the pan, it cooks much faster than if it were whole. You also can set it and forget it until the timer goes off since it no longer needs to be flipped. All great things when you've got a hungry family to feed. 

backbone
cut out backbone
removed backbone
pre-roast

Potatoes are a common compliment to chicken, but you could really use any root vegetable. Butternut squash or sweet potato (or all three!) would be great here as well. The onions get nice and browned while they roast and the extra time the potatoes take in the oven at the end really make them irresistably crispy. 


one pan chicken with crispy potatoes

serves four

Ingredients: 

  • 1 3 1/2 to 4 pound chicken, whole
  • 4 large red potatoes, cut in half lengthwise, and then halved lengthwise again, then cut into 1/2 inch pieces
  • 1/4 of a medium yellow onion, cut into 1" pieces
  • 3 large cloves garlic, sliced
  • 1 teaspoon fresh thyme leaves
  • smoked paprika
  • kosher salt
  • freshly ground pepper

Preparation

  1. Pre-heat the oven to 400 degrees with a rack in the middle position. 
  2. Remove any organ pieces from inside the chicken and pat dry with paper towels. Place the chicken breast side down on a large cutting board. With kitchen scissors, cut along one side of the back bone starting at the neck and ending at the tail. Cut the other side and remove the back bone (see images above for reference). Flip the chicken over and place the heel of your hand in the middle of the breast bone. Put your other hand on top and push down as hard as you can to break the rib bone. The chicken will then lay out flat.
  3. Transfer the chicken to a large (at lease 12") oven safe (no plastic on the handle) skillet, with the breast side up and the legs laying flat. Spread the potatoes, onion and thyme around the chicken and sprinkle with smoked paprika. Season the whole dish with a couple big pinches of kosher salt and a light sprinkle of freshly ground pepper. 
  4. Cook the chicken until the thickest part of the thigh registers 165 degrees, about 40-45 minutes. Transfer the chicken to a plate and allow it to rest while you finish the potatoes. 
  5. Even out the potatoes in the skillet and transfer back to the oven. Cook until the potatoes are well browned, about 10 minutes. Serve alongside sturdy sautéed greens such as kale. Mmm. Yes to kale.  

biscuit sandwiches with bacon, egg + tomato

biscuit sandwich with bacon, egg + tomato

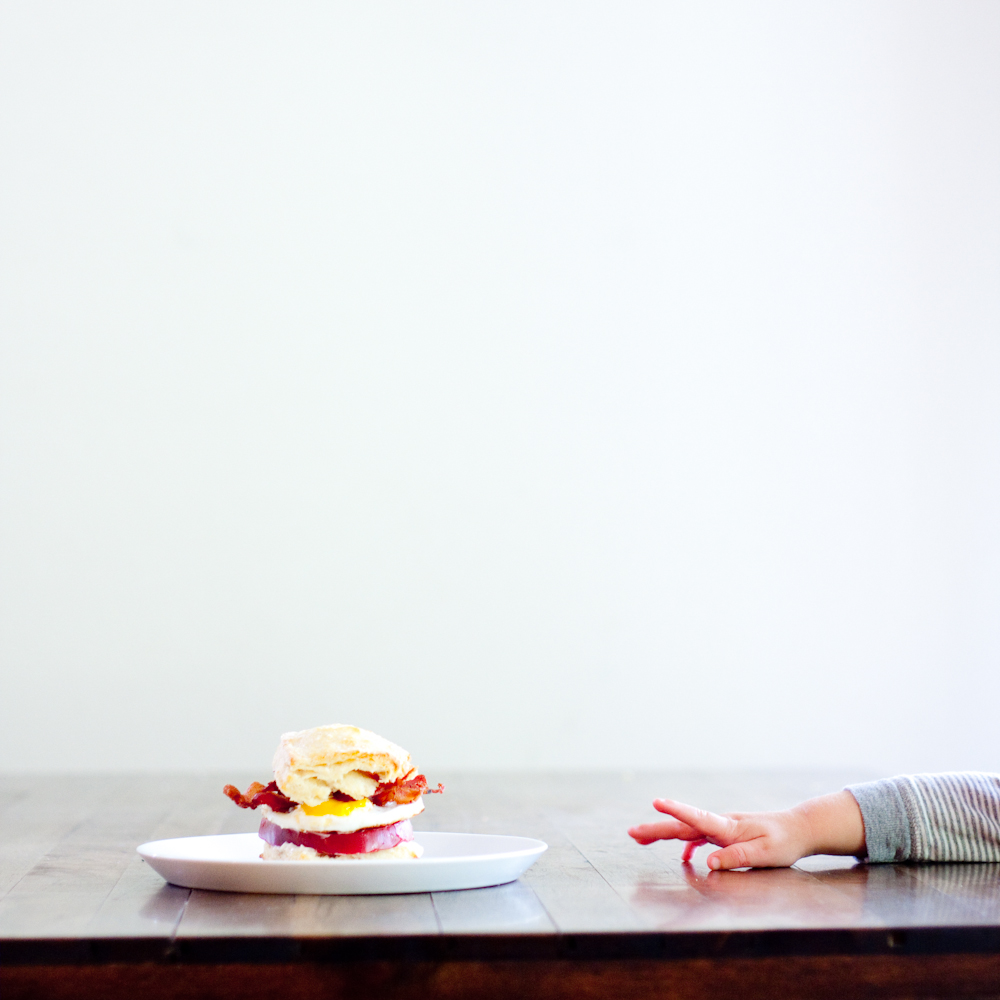
I used to go through a major crisis when we went out for brunch. The decision to go sweet or savory was so hard for me, you'd think I was making a life and death decision. Nearly every time, I go the savory route, mostly because so much sweet so early isn't usually my jam but a little something sweet is nice. We finally figured out that if we ordered a pancake for the table, our problem (my problem) was solved. This made all my brunch decisions easy, breakfast sandwich please, with a side of pancake to share.  

If there is a breakfast sandwich on the menu, I want it. If said breakfast sandwich is made with a biscuit, definitely get that in front of my face as soon as possible. My love for biscuit sandwiches probably stems from many childhood mornings at McDonald's. Just a biscuit with sausage, maybe some cheese. No egg (was it even really egg back then?) and definitely NOT on an english muffin. 

buttermilk biscuits

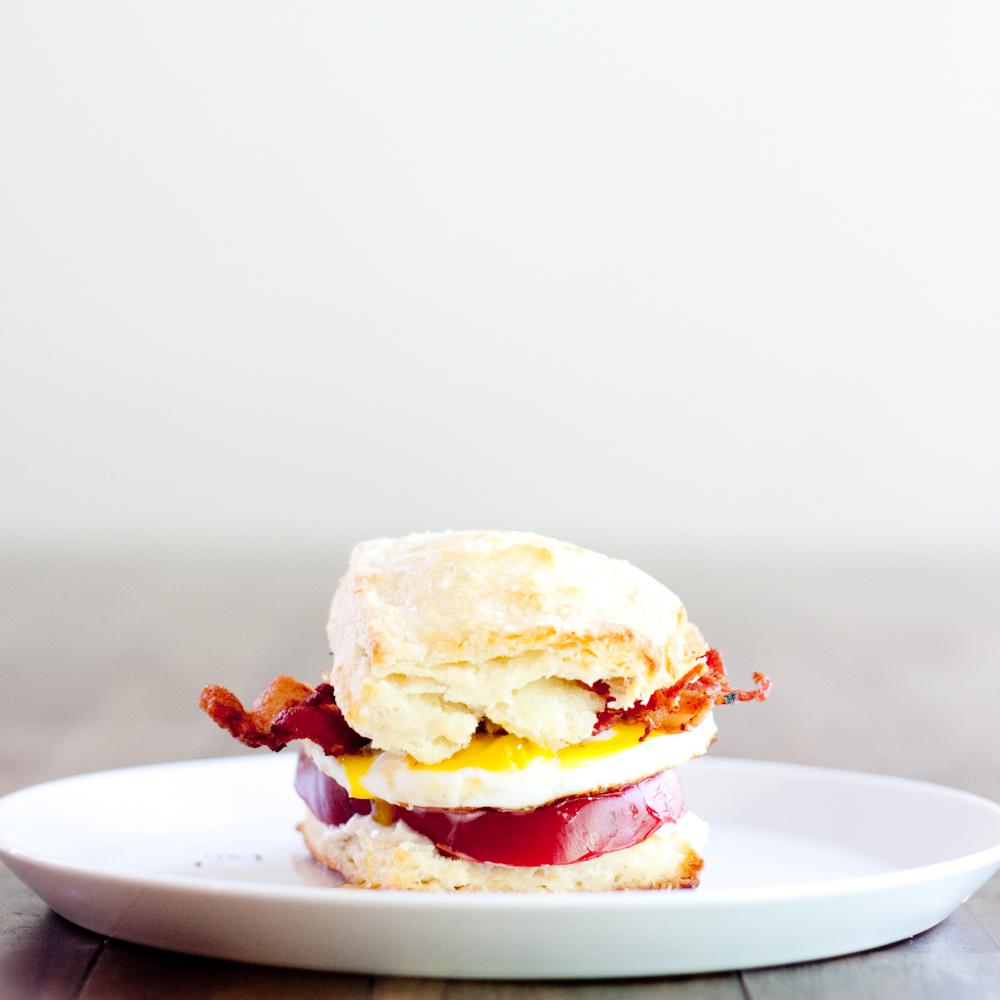
Now that most of our brunches happen at home (have you ever tried to have a civilized meal in public with a toddler?), I've been on the hunt for the perfect biscuit recipe. There isn't a huge amount of variation in the method, except for the additional step of folding the dough to create some extra beautiful layers. Of course, the ingredients or add ins vary, like these gorgeous sweet potato biscuits or these with honey and rosemary, which are both on my to-do list, but for the most part, the magic is in a few basic rules of biscuit making: work with cold ingredients, mix it all quickly and don't overwork the dough. Those luscious layers don't happen by accident, that's the cold butter working to create steam, pushing the dough into sheets of flaky nirvana. The fat in the butter works to tenderize the dough, making it soft AND flaky . YES. That's what we want! Bake them in a hot oven, top them with some salty bacon, a fried egg, a big hunk of tomato and a dollop of mayonnaise and then call me, because I'm coming over. 

biscuit sandwiches with bacon, egg + tomato

When you've got a lazy weekend morning, make a batch of these biscuits. Go wild and double the recipe if you can and freeze half of the biscuits to make weekday biscuits a thing. They could be a thing, you know. I mean, any weekday that starts out with biscuits is all right by me. These biscuits are quite good, too. They're soft, buttery and are the perfect vehicle for all kinds of breakfast sandwich fare. Next time I'll remember the "L" in B.L.T. and add a little spicy arugula for a fresh kick. 


biscuit sandwiches with bacon, egg + tomato

serves 6

find the original biscuit recipe (and much prettier ones at that!) here

Ingredients: 

  • 9 oz all purpose flour (about 2 cups)
  • 2 1/2 teaspoons baking powder
  • 1 teaspoon kosher salt
  • 5 tablespoons very cold unsalted butter, cut into 1/2 inch cubes
  • 3/4 cup cold buttermilk, plus more for the top of the biscuits
  • 6 eggs
  • 12 slices of bacon (you should probably throw a couple extra on in case someone wants a sample)
  • mayonnaise
  • 1 large tomato, cut into thick slices

Preparation: 

  1. Preheat oven to 400 degrees. Line a baking sheet with a silicone liner or parchment paper.

  2. In a large bowl, whisk together the flour, baking powder, and salt. Add the butter cubes, and use a pastry cutter or a couple of forks to mix the butter into the flour mixture. The pieces of butter should not be smaller than the size of peas and the mixture will start to look like course meal or wet sand. Stick the bowl in the fridge for 5-10 minutes to chill.

  3. Add the cold buttermilk to the flour and butter mixture and mix it quickly with a fork until it's moist. There may still be some dry bits of flour, that's okay. They'll get mixed in in a minute.

  4. Dump the dough (and any extra flour) onto a lightly floured work surface and knead gently about 3-4 times until you have a mostly cohesive mass. The dough might still be a little shaggy, but we'll work that out right now. Roll the dough into a rectangle about 9'' by 5". Fold the dough into thirds like a letter, folding the long sides in toward the middle, overlapping one another. Roll out the dough again into a 9" by 5" rectangle. Fold it up again like a letter. Roll it out again into a 9" by 5" rectangle. Repeat the letter folding one more time, and then roll it out to about 3/4 inch thick. With a large knife, cut the dough into six equal pieces. Transfer the biscuits to the baking sheet and brush the top of each biscuit with a little buttermilk. Sprinkle with kosher salt. 

  5. Bake for about 12-15 minutes, until the biscuits have puffed and are golden brown around the edges. Transfer the biscuits to a wire rack to cool slightly. 

  6. While the biscuits are in the oven, cook the bacon in a large skillet over medium high heat until crisp. Let them drain on some paper towels.

  7. Wipe out the bacon skillet and cook the eggs over easy, until the whites are set, but the yolk is still runny. 

  8. Now that the biscuits are cool enough to handle, cut them in half and spread a good dollop of mayonnaise on the bottom of each biscuit. Place a tomato slice on top of that, and then put an egg on it. Give it a light sprinkle of salt and freshly ground pepper and top with two slices of bacon. Place the top half of the biscuit on, well, the top and take a giant bite. Let the egg and tomato drip down your elbows. "Mmmm" and "Yumm" loudly. 


fruit leather

fruit leather

I hope I'm not alone in this. I have very high standards for what I consider consumable produce. When I'm at the grocery store, I'm the weirdo examining every detail of each piece of fruit I place in my basket. No bruising, no discoloration, and certainly no insect holes (I've been traumatized by not adhering to that last one). On the way home I make a detailed plan to wash, dry and cut everything to make it more accessible and easier to eat, but by the time I strap a toddler to my chest and haul a diaper bag and 80 pounds of groceries up four flights of stairs, I'm lucky if everything makes it into the fridge. Tomorrow. I'll wash and chop and make it all look appetizing, tomorrow. 

Well, tomorrow comes and goes and it's a week later and that sad clamshell of strawberries has been pushed into the depths of the fridge behind the container of hummus and now that we have licked that bowl clean, the strawberries gasp for air, pleading to be acceptable for consumption. Sadly, they just aren't pretty enough anymore. They're dark and starting to shrivel. Normally, they would be tossed under the sink with the rest of the garbage, but I feel bad for them. After all, our relationship had a great start. 

fruit leather puree
blender
strawberryraspberrypuree

As a kid, I remember having a systematic way of eating a fruit roll up. I never unrolled it completely. I only exposed what I was about to eat and kept the rest tightly wrapped. Nibble after nibble, I'd make my way down it's entire foot length, pressing each piece against the top of my mouth until it dissolved. It was probably the most fun snack we ever had in our lunches. Unless, for some unknown reason, we had pop rocks that day. 

You may have already guessed that I might have been a fat kid. It's true. Pop rocks and celery sticks coated in seasoned salt don't exactly scream health food. We had a lot of fun, but I've had to work pretty hard to get keep my 'pop rocks fat' off. In an effort to have a little fun, my son gets to have an occasional treat here and there, but I try to give him what I hope to be a balanced diet. The original fruit roll up has quite a bit of sugar in it, but homemade fruit leather makes a great low sugar snack and gives a trash can pardon to those less than perfect strawberries. 

fruit leather

I'm gonna be straight with you. This stuff takes a long time to make. It's basically an all day affair. Granted, much of that time is a long stint in a pot, a long stint in the oven and a long time cooling and drying so there isn't a ton of manual labor, but it's certainly not quick. If you're able to, I'd say double the batches and make a ton of it so that you'll feel like you'll get more fruit (leather) for your labor. 


fruit leather

makes 2 sheet pans

Ingredients: 

For strawberry+raspberry

  • 2 cups strawberries, stemmed and halved
  • 2 cups raspberries
  • 1 tablespoon sugar

For aprium+blackberry

  • 3 cups pitted and chopped apriums (a plum/apricot hybrid, but feel free to use either of those, or peaches would be excellent, too)
  • 1 cup blackberries
  • 1 tablespoon brown sugar
  • 1/2 teaspoon cinnamon
  • 1/4 teaspoon ground ginger

Preparation

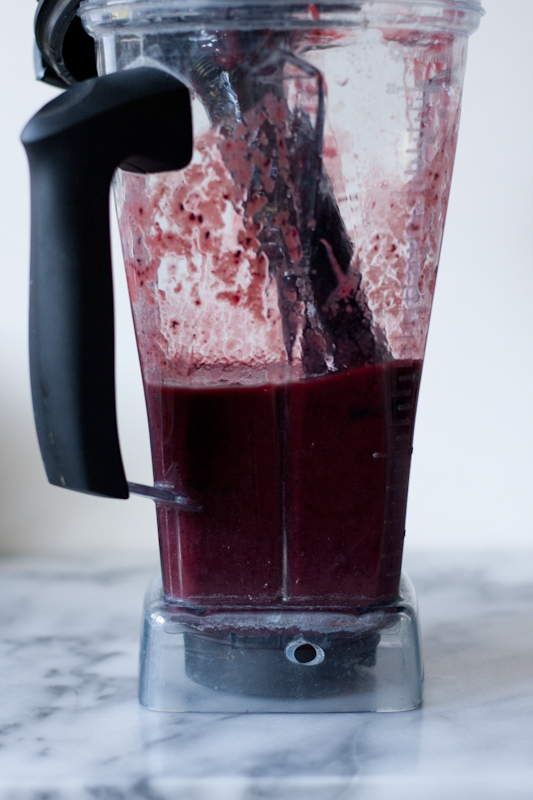
  1. Puree each mixture separately in a blender until very smooth. If you don't want seeds, strain both mixtures through a fine mesh sieve and place each in it's own pot over medium low heat and cook until thick, about one hour. 
  2. Pre-heat the oven to 200 degrees and line two baking sheets with non-stick liners. Spread the mixtures thinly over the liners and smooth the top with an offset spatula, if one is available. 
  3. Dry the mixture in the oven until slightly tacky but not sticking to your finger, about 3 hours. Dry on the liner on a drying rack until completely dry, at least three hours and up to overnight. 
  4. Place a sheet of parchment on top of the fruit leather, covering it entirely and flip it over. Carefully remove the non-stick liner and cut into strips, roll up,  and secure with a small piece of tape. Store in an airtight container for up to one month.